


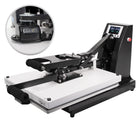


Applying Ninja Transfers with a Handheld Craft Press
Set your Cricut to 320°F-340°F and use hard pressure when pressing. Press for ~20 seconds. Peel after 5 seconds, hot or cool. Second Press for 20 seconds.
We recommend watching the video above for step-by-step pressing instructions

1. Position Your Design
There is no requirement to pre-iron your shirt, your transfer will adhere perfectly fine without doing so. Position the transfer in the desired location. Normally it is 3-4 inches down on the front of an adult t-shirts, 2-3 inches down on the front of a youth t-shirt and an inch lower on the back side of the same type of garment. The best way to figure this out is to apply a dtf transfer to one shirt and then try it on. From there, you'll have more confidence when placing it on the rest of your products.
You can also purchase a Perfect Placement Guide for your future orders which gives you placement for various garment types like adult, youth, toddler, infant, and even 2X-6X sizes.

2. Press
Set your Cricut to 320°F-340°F degrees and 20 seconds. If that is not hot enough where the transfer is adhering to your shirt, increase it by 15 degrees at a time and try again. You can't overpress your design, so try until you figure out the right settings.
Before pressing, place the provided parchment paper over the transfer, pressing down with hard pressure for 20 seconds.
Remember that you cannot overpress your transfers. The better they are pressed, the more durability they have through washing and drying.

3. Peel Hot After a Few Seconds
With our proprietary Ninja Peel Technology, you can peel hot or cool. Wait a few seconds (or more) and peel! If parts of the design are not sticking, lay it back down and press again with added pressure and heat (+15°F). If unsuccessful, increase heat by 15°F increments until it works. Remember, the great thing about NinjaTransfers is that repeated pressing won't damage the transfer.

4. Final Press
Place the parchment paper included or a single layer of t-shirt material over the design and press again with the same settings for 20 seconds to soften the design, increase durability, and remove shine.
If you want a shinier finish instead, you can use our Protective Guard Sheet for this result.


