If you're new to making custom apparel with DTF (Direct-to-Film) transfers, you've probably heard that using a heat press is the best way to get professional results. Heat presses and, to lesser degrees, Cricut handheld presses offer consistent pressure and temperature, which are crucial for a successful transfer.
But what if you don't have access to a heat press or even a Cricut? Can you still achieve good results with just a home iron? The answer is yes-if you carefully follow the right steps. However, we still recommend heat pressing for best results, especially when jumping into the t-shirt business.
This guide is for crafters, hobbyists, and anyone looking to create custom apparel at home using an iron for their DTF transfers. While there are some challenges, you can still make fantastic, durable designs with some care and attention. This article provides the proper technique, along with some essential tips to ensure your project turns out great.
Table Of Contents
- Pressing DTF Transfers
- What You Need
- How To Use An Iron To Apply DTF Transfers
- Tips For Using An Iron To Apply DTF Transfers
- Practice Makes Perfect For Getting The Best Iron-On Results

Pressing DTF Transfers
DTF transfers are popular for applying intricate, vibrant designs onto fabric. The process involves printing your design onto a special film along with an adhesive powder. This DTF transfer can then be pressed onto a garment. A precise combination of heat and pressure is needed for the adhesive to activate and bond the design to the fabric.
This is where a heat press shines-providing uniform pressure and consistent heat across the entire design, typically at around 310°F. However, achieving that same consistency can be tricky when using an iron. The heat is less even, and applying the exact pressure is more challenging, especially across larger designs. Still, with careful attention, you can make it work. Here's how.
What You Need
- A home iron that reaches temperatures of 310°F
- DTF transfer
- Garment (cotton, polyester, or fabric blend)
- Protective guard sheet or parchment paper
- Timer (smartphone or kitchen timer works)
- Firm, heat-resistant surface (avoid soft ironing boards)
- DTF alignment ruler (optional, for perfect placement)
How To Use An Iron To Apply DTF Transfers
Using an iron to apply DTF transfers requires a bit more care and attention than using a heat press, but following these steps can achieve solid results.
- Prepare your workspace: Choose a flat, hard surface for ironing. A standard ironing board may not provide the firm surface needed, so consider using a sturdy table covered with a heat-resistant mat or a towel. Make sure your garment is laid out smoothly. You only need to pre-iron the fabric if it's very wrinkled or damp.
- Set your iron temperature: Begin by setting your iron to medium-high, typically between the cotton and linen settings (around 310°F). Avoid going higher than this, as temperatures around 400°F can scorch your garment. If your iron doesn't have exact temperature settings, start on a medium setting and gradually increase until you find what works best for your material.
- Position your design: Carefully place your DTF transfer on the garment, ensuring it's correctly aligned. Use a DTF Alignment Ruler for perfect placement.
- Cover with a guard sheet: Once in position, place a piece of parchment paper or a protective guard sheet over the transfer to protect both the design and your iron.
- Press the transfer: Press the iron firmly on the transfer, applying as much pressure as possible. Hold the iron in place for about 20-30 seconds. Do not move it around to avoid shifting the design. For larger designs, you'll need to press in sections. Keep track of the time spent on each section to ensure the application is even.
- Check the edges and details: Pay close attention to small details and thin lines in your design. These areas can be more fragile when peeling, so take your time to ensure everything has adhered properly. At this stage, you may want to press those details for a few seconds longer.
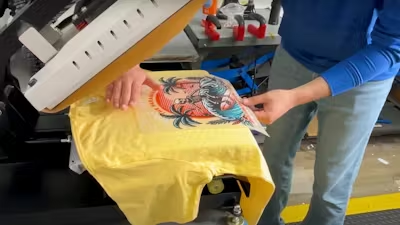
- Peel: Wait at least 5 seconds, then gently peel back the film from one corner. Make sure to "peel with your eyes" paying close attention to small areas. If the design didn't fully adhere, lay the film back down and press again.
- Final press: Once the film is peeled off, place the parchment paper, thermal sheet, or a thin cloth over the design and press again for 15 seconds. This final press helps soften the design, increases durability, and removes the shine. Learn more about reducing the plastic feel of DTF transfers.

Tips For Using An Iron To Apply DTF Transfers
Even if you have the perfect setup and follow the steps above closely, there are still nuances depending on your surface, garment material, iron, and design. Here are some expert tips that will improve your process and results.
- Find the exact right temperature: Every iron is different, so take the time to experiment with your iron's settings. Start with a medium-high setting and increase the heat slightly if the transfer isn't sticking. Be careful not to go too high, as this can scorch your fabric.
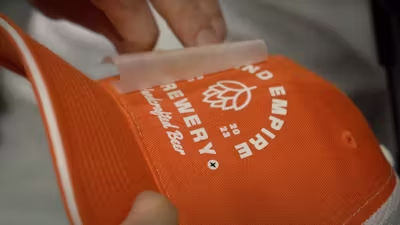
- Use thermal heat tape: Once you've positioned your design correctly, use thermal heat tape to keep it in position. You will only need a couple of pieces, and they can be reused.
- Press, don't slide: Hold the iron in place with firm pressure instead of moving it around when applying the transfer. Sliding the iron can cause the design to shift, especially while the adhesive is liquefied, leading to a misaligned or smudged transfer.
- Use parchment paper for extra padding: When pressing uneven sections of a garment, such as the upper back of a T-shirt where the collar sits underneath, consider placing a folded piece of parchment paper between the layers of fabric to create a more even surface.
- Work in sections for larger designs: If your design is larger than the iron's plate, press it in sections. Be mindful of your timing to ensure each part of the design receives equal heat and pressure. Planning your workflow may be valuable, especially when doing a larger run.
- Use a timer: To maintain consistency, use a timer or smartphone app. This will help you track how long you press each section, ensuring even heat distribution across the entire design.
- Watch for incomplete transfers: As you begin peeling the film, keep a close eye on the design. If you notice that parts of the design haven't fully transferred, stop peeling immediately. Lay the film down and re-press that section with more pressure or heat. Using the tip of the iron may help.
- Pay attention to thin lines and small details: Thin lines and small details in your design are more fragile during peeling. Take extra care when peeling these areas to avoid tearing or lifting.
- Consider the fabric type: Different fabrics may require slight adjustments in your technique. For example, more delicate fabrics may need lower heat, while thicker fabrics like denim might require more pressure. A protective guard sheet can help prevent the fabric from scorching better than parchment paper-here's how to use one.
- Consider your ironing surface: Some ironing boards have a metal mesh pattern under the padding, and this uneven surface can interfere with heat distribution and pressure. You may find that a sturdy tabletop with a towel laid over it works better.
- Washing your ironed-on DTF transfers: For best results, turn your garment inside out, machine wash cold, and tumble dry on low heat or hang dry. Read more tips on washing graphic tees.

Practice Makes Perfect For Getting The Best Iron-On Results
Using an iron to apply DTF transfers might offer a different level of consistency than a heat press, but with careful attention to detail, you can still achieve impressive results. By finding the right temperature, applying steady pressure, and following the tips outlined above, you can create beautiful, durable designs right from the comfort of your home.
If you plan to make custom apparel more frequently or on a larger scale, investing in a heat press or a Cricut is worth considering for more reliable results. But for those one-off projects, gifts, or small runs, an iron can get the job done.
For high-quality DTF transfers and supplies you can trust, Ninja Transfers has you covered. We also provide high-quality blank apparel through Ninja Blanks for one-stop shopping, which pair perfectly with our custom iron on patches from Ninja Patches. Whether you're crafting for fun, making custom gifts, or thinking about stepping up your game, our products and services are designed to help you bring your creative visions to life.