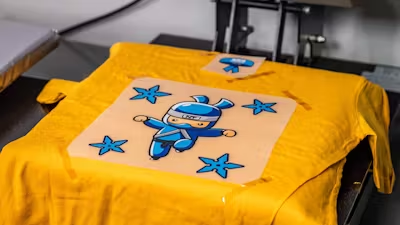
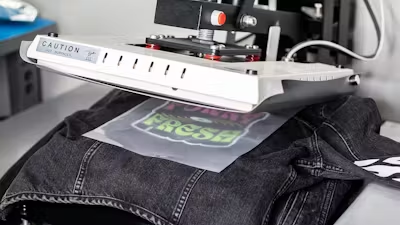
We sometimes get asked about layering DTF transfers, especially by DIY crafters and small business owners looking to create unique personalized designs. Layering DTF transfers can open up exciting possibilities for your custom apparel projects, whether you want to add employee names to company shirts, update old designs, or create one-of-a-kind artistic pieces.
The short answer: Yes, you can layer DTF transfers on top of each other. However, if you're doing the layering at once, you need to press each transfer separately, one after the other. Getting perfect results requires proper technique and attention to a few key details, which we cover in this guide.

Table Of Contents
How To Layer DTF Transfers
Layering DTF transfers follows a straightforward process that builds on the basic heat pressing techniques you may already be familiar with. Here's the step-by-step instructions:
- Position your design, cover it with a guard sheet or parchment paper, and press your first transfer following standard DTF pressing instructions — 310°F for 13 seconds with medium to high pressure.
- After pressing, peel off the carrier film and give the design a second press for about 15 seconds with a guard sheet. This helps ensure durability and reduces shine.
- Let the print cool completely. This cooling period prevents any adhesive activation when positioning your second DTF layer.
- Position your second transfer exactly where you want it on top of the first design. If necessary, secure it with thermal heat tape.
- Press the second transfer using the same temperature and pressure settings as the first, and then give it a second press as well.
- For additional layers, repeat these steps, allowing proper cooling time between each new transfer.
Tips For Layering DTF Transfers
- Never press multiple transfers simultaneously when layering. The adhesive can stick to the bottom carrier film, causing your second design to pull away when peeling the first one.
- The only exception is when pressing separate, non-overlapping designs. In these cases, carrier films can slightly overlap if the actual designs don't touch.
- Use a DTF alignment ruler set to ensure precise placement before loading your garment onto the heat press.
- Secure your designs with thermal heat tape before pressing. This becomes especially important when repositioning your garment for multiple pressings.
- Always protect your fabric with a guard sheet, parchment paper, or silicone application pad. This protection becomes even more crucial during multiple pressings to prevent scorching.
- Use heat press pillows when working around buttons or zippers to create an even pressing surface. Pillows are also ideal for printing on pockets.
- You may want to trim carrier film closer to your design for better visibility and easier positioning, but always leave some edges for easy peeling.
- To speed up production, use a home hair dryer set to cool temperature between pressings. Even 10 seconds can help prep the surface for the next layer.

Use Cases For Layering DTF Transfers
Layering DTF transfers creates opportunities for customization that would otherwise be expensive or impractical. Here are several real-world applications where this technique proves invaluable for both DIY projects and small business operations.
Adding Staff Personalization
Want to add employee names to company shirts with logos? Press your standard left chest logo first, then layer individual names on top, slightly overlapping if desired. This creates the appearance of fully custom prints for each employee without the cost of individual designs. This technique also works for adding DTF names over existing designs made with other print methods.
Personalized Team Uniforms
When you layer DTF transfers, team jerseys become simple to customize. Start with your team logo or main design on the back or front, then add individual player names and numbers as separate layers.
Updating Previous Designs
Leftover shirts from last year's event with outdated information? Create new DTF transfers sized to cover old dates or details. Order these update elements on gang sheets to save money, then cut them out individually.
Pro Tip: Include an outline or box matching the shirt or design background color to prevent old numbers from peeking out around the edges.
Fixing Mistakes
Discovered a typo after ordering or printing? You don’t have to scrap the whole batch. Order a gang sheet with corrective elements sized to layer precisely over the mistake. This works best when the text or element has a solid background. If it’s intricately overlaid with the shirt as the background, it may be too difficult. For help designing clean fixes, read our top 10 DTF design tips for beginners.
Artistic Creations
Layering different design elements can transform standard shirts into unique pieces. Plan your components, order them on gang sheets, and cut out individual pieces. Then arrange and layer elements differently for each shirt to create one-of-a-kind designs that command higher resale values. For more ideas, check out our guide to designing t-shirts that sell.
Special Effects
Layering is a smart approach when using special effects in your DTF prints. For example, our Puff DTF transfers create eye-catching raised prints, but you might want this effect on only specific parts of your design. Press your standard DTF transfer first, then layer puff elements on top for emphasis.

Making The Most Of DTF Layering
Layering DTF transfers opens up endless possibilities for customization without expensive equipment or minimum order requirements. Start with simple projects like adding names to logos, then experiment with more creative applications like puff transfers as you gain confidence. Remember to use gang sheets when ordering multiple small designs to maximize cost efficiency.
Ready to try layering DTF transfers? You can count on Ninja Transfers for high-quality custom-printed transfers and heat pressing supplies, plus premium blank apparel through Ninja Blanks. We're here to support your creative projects and help your business grow.


