Removing UV DTF Permastickers might seem like a daunting task, considering their impressive durability and strong adhesive qualities. Whether you're looking to replace a design, fix a placement mistake, or simply want a fresh start, the process is fairly straightforward, but it's not always a walk in the park. In this guide, we'll walk you through everything you need to know to get the job done right.
Table of Contents
- How Permanent Are UV DTF Permastickers?
- How Hard Is It to Remove Them?
- Helpful Supplies List
- Methods for Removing UV DTF Permastickers
- Top Tips for Removing UV DTF Transfers
- Conclusion

How Permanent Are UV DTF Permastickers?
Our Permastickers are designed to be incredibly durable and long-lasting, with adhesive properties that ensure they stay firmly in place on a wide range of surfaces. While they're not permanent in the strictest sense-they can be removed with the right techniques-they're built to withstand exposure to sunlight, harsh weather, and regular wear and tear without fading, peeling, or losing adhesion.
In other words, they're not going anywhere without some effort.
How Hard Is It to Remove DTF Permastickers?
The ease of removal can vary depending on the size of the sticker, the intricacy of the design, and the type of surface it's adhered to. However, with the right approach and a few common supplies, you can successfully remove your Permasticker without too much hassle.
Generally, the process involves heating the sticker to temporarily liquefy the adhesive, making it easier to peel or scrape off. Depending on the surface you're working with, different approaches, tools, and supplies come into play. Once the sticker is removed, you'll need to tackle the leftover adhesive.
Whether you're dealing with glass, plastic, or another material, understanding the best methods for adhesive removal will make the process smoother and help protect the underlying surface.

Helpful Supplies List
You won't necessarily need all of these supplies to remove your UV DTF Permasticker, as the tools and materials required can vary based on the surface you're working with and the size of the sticker. However, having a few key items on hand will make the process much easier. Here's a rundown of supplies you might need:
- Scraper, craft peel knife, or plastic razor blade: These tools are essential for gently lifting the edge of the sticker without damaging the surface underneath. A plastic razor blade is particularly useful for delicate surfaces where you want to avoid scratches. Alternatives include a credit card or a flat, sturdy piece of plastic like our application squeegee.
- Craft heat gun or blow dryer: Applying heat is crucial for softening the adhesive, making the sticker easier to remove. A craft heat gun offers more precision, but a household blow dryer can work just as well in most cases.
- Non-abrasive scrub pad/sponge: After the sticker is removed, a non-abrasive scrub pad or sponge can help clean up any remaining adhesive without scratching the surface. Avoid anything too rough, as it could damage more delicate materials.
- Washcloth/microfiber cloth: These are useful for wiping down the surface after adhesive removal. Microfiber cloths are particularly effective because they're gentle on surfaces and great at picking up any remaining residue.
- Large pot for hot water: If you're dealing with a small, heat-resistant item, soaking it in hot water can help loosen the adhesive. This method works well for items like glass jars or metal containers.
- Dish soap: A good dish soap with grease-cutting power can help break down adhesive residues. Dawn or Palmolive with Oxy are popular choices for this task.
- Commercial adhesive remover, rubbing alcohol, acetone, or nail polish remover: These are chemical options for breaking down stubborn adhesive residue. GooGone is a go-to for many, but rubbing alcohol or acetone can work well too, depending on the surface. Always test a small area first to ensure it won't cause damage.
- Tweezers/craft tweezers: These are handy for starting the removal peel and for picking off small bits of sticker or adhesive that might be difficult to remove with your fingers alone. Craft tweezers are available with different sizes and tips so you can get a proper grip.

Methods for Removing UV DTF Permastickers
The method you choose will largely depend on the surface or item you're working with. Some items can't be soaked in water, while others may be sensitive to heat or prone to scratches. Understanding the characteristics of your specific surface is key to selecting the right approach. Below, we outline two effective methods: the hot water soak method and the heat gun/blow dryer method.
Hot Water Soak Method
This method is effective for heat-resistant items that can get wet (like glassware or mugs). Follow these steps to remove your UV DTF Permasticker using the hot water soak method:
-
Prepare the hot water: Fill a large pot with water and heat it until it reaches a temperature of around 170°F (77°C) or more. Avoid using boiling water; if it reaches a boil, allow it to cool for a bit. Add some grease-cutting dish soap (such as Dawn or Palmolive with Oxy).
-
Submerge the item: Carefully place the item with the sticker into the pot, ensuring that it is fully submerged in the hot water. Let it soak for about 10 minutes to soften the adhesive.
-
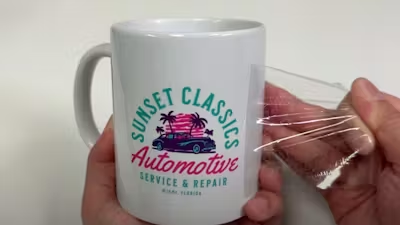
Test for peeling: After soaking, remove the item from the water. Use a scraper, craft peel knife, or plastic razor blade to lift the edge or corner of the sticker. If the sticker is a single solid shape, see if you can peel it off in one piece. Start slowly and use steady pressure to avoid tearing the sticker.
-
Scrape off the sticker: For stickers with intricate designs or free-floating elements (those that aren't connected to the main shape and require more precision), you'll likely need to scrape them off in sections. If the adhesive begins to cool and harden, re-submerge the item in the hot water to soften it again.
-
Remove leftover adhesive: Once the sticker is fully removed, dry the item with a towel. Apply GooGone, rubbing alcohol, or a similar adhesive remover to the remaining adhesive. Use a washcloth, sponge, or non-abrasive scrub pad to rub the area until all residue is gone.
-
Final wash: After the adhesive is completely removed, thoroughly wash the item with dish soap to remove any remaining chemicals and restore the surface.

Heat Gun or Blow Dryer Method
This method is for items that can't be soaked in water or are too large to submerge. Here's how to remove your UV DTF Permasticker using a heat gun or blow dryer:
-
Set up your heat source: Depending on the surface and material of your item, choose between a blow dryer and a craft heat gun. A blow dryer is generally safer and less intense, making it suitable for most surfaces. If using a craft heat gun, be cautious of the higher heat output and start with the tool further away from the sticker.
-
Apply heat to the sticker: Turn on the heat gun or blow dryer and direct the heat to the sticker. Keep the tool moving to evenly distribute the heat and avoid concentrating on one spot, which could damage the surface. The goal is to heat the sticker just enough to soften the adhesive-not to burn or melt the sticker itself. You may need to experiment with the distance and duration of heat application to find the right balance.
-
Test for peeling: After heating for a minute or so, use a scraper, craft peel knife, or plastic razor blade to lift an edge or corner of the sticker. If the sticker is a single solid shape, try to peel it off in one piece, applying gentle but steady pressure.
-
Scrape in sections if necessary: For stickers with intricate designs or free-floating elements (small, separate parts that aren't connected to the main sticker), you may need to scrape them off in sections. If the adhesive starts to harden again as it cools, reapply heat to soften it. Continue this process until the entire sticker is removed.
-
Remove leftover adhesive: After the sticker is off, you'll likely find some adhesive residue remaining. Apply GooGone, rubbing alcohol, or another adhesive remover to the area, and use a washcloth, sponge, or non-abrasive scrub pad to clean off the residue.
-
Final cleaning: Once all adhesive is removed, clean the surface with dish soap and water (if applicable) to remove any remaining residue and restore the surface.

Tips for Removing UV DTF Transfers
Here are some comprehensive tips for removing UV DTF Permastickers, incorporating safety, technique, and surface-specific advice. By following these tips, you can remove them effectively while keeping your surfaces in great condition.
- Test a small area first: Before applying heat or any adhesive remover, test the method on a small, hidden part of the surface. This ensures you won't damage the material or cause discoloration.
- Work in a well-ventilated area: If you're using chemical adhesive removers like GooGone, rubbing alcohol, or acetone, make sure you're in a space with good airflow. This will help you avoid inhaling fumes and keep you safe.
- Wear protective gloves: To protect your hands from heat, sharp tools, or chemical removers, always wear gloves. This is especially important when dealing with hot water or potentially irritating chemicals.
- Use a blow dryer for safer heat application: When unsure about a surface's heat tolerance, start with a blow dryer instead of a heat gun. Blow dryers provide gentler, more controlled heat, reducing the risk of damage.
- Be patient with intricate designs: Stickers with intricate designs or free-floating elements (small, separate parts) can't always be peeled off in one go. Take your time, and work section by section, reheating and scraping as needed.
- Avoid scratching delicate surfaces: Use a plastic razor blade or a similar tool to avoid scratching delicate surfaces like glass or polished plastic. Metal scrapers should only be used on more durable surfaces.
- Reapply heat as needed: The adhesive will start to harden as it cools. If you're working on a large sticker or a detailed design, you may need to reheat sections as you go to keep the adhesive soft.
- Use non-abrasive pads for adhesive removal: After removing the sticker, use a non-abrasive scrub pad or sponge to clean off any remaining adhesive. This is crucial for avoiding scratches, especially on plastic and glass.
- Choose the right adhesive remover: For stubborn adhesive, start with a mild remover like rubbing alcohol. If that doesn't work, move to stronger options like GooGone or acetone, but always test first to ensure they won't damage the surface.
- Heat and soak plastic with caution: When working with plastic items, be careful with both heat and soaking methods. Too much heat can warp plastic, and soaking can cause swelling or distortion. Use mild heat and shorter soaking times.
- Have cleaning supplies ready: After removing the sticker and adhesive, thoroughly clean the surface to remove any residue from the remover. Use dish soap and warm water, followed by a final wipe with a microfiber cloth to restore the item's shine.
-
Inspect for damage post-removal: Once you've finished, inspect the surface for any leftover adhesive, scratches, or damage. If needed, consider professional restoration for valuable or delicate items.

New Permastickers Are Just a Few Clicks Away
Removing UV DTF Permastickers is straightforward with the right tools and techniques, but depending on the surface and design, it can sometimes be tricky. If you run into any issues or need additional guidance, don't hesitate to reach out-we're always here to help. And if you're planning your next project, remember that ordering UV DTF Permastickers in gang sheets is a great way to save money while getting the most out of your designs.