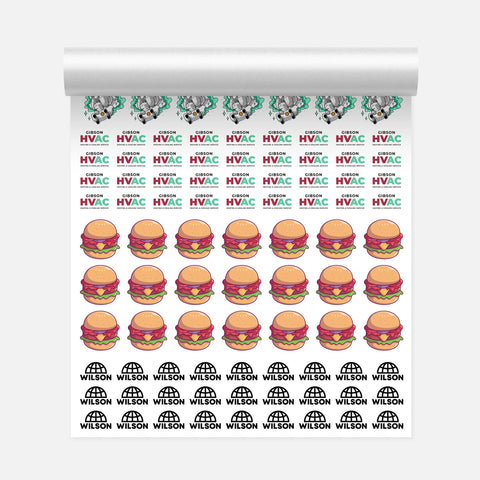
DTF 帮派表
Add a DTF Sample Pack to Cart - $0.01 - Add to Cart
寻找长度超过 20 英尺的组合床单,只需将数量更改为“2”,现在您就有了 40 英尺的组合床单!
没有准备好打印的帮派表?访问我们的DTF Transfers By Size页面或使用我们新的Ninja Gang Sheet Builder构建您自己的页面。
可下载的模板:
*首选矢量/首选 300+ DPI
*嵌入任何导入的文件
*请勿镜像
*仅限透明背景
*将所有文本展开为路径
22" x 2 英尺 - AI / PDF / 使用 Ninja Gang Sheet Builder 构建
22" x 5 英尺 - AI / PDF / 使用 Ninja Gang Sheet Builder 构建
22" x 7 英尺 - AI / PDF / 使用 Ninja Gang Sheet Builder 构建
22" x 10 英尺 - AI / PDF / 使用 Ninja Gang Sheet Builder 构建
22" x 12 英尺 - AI / PDF
22" x 15 英尺 - AI / PDF
22" x 17 英尺 - AI / PDF
22" x 20 英尺 - AI / PDF
特征
- 采用最高品质的油墨、胶片和柯达 TPU 粉末印刷,可为您在任何类型、材料、颜色或弹性的服装上提供最亮的白色和颜色。
- 我们的工艺和材料为您提供更高的耐用性、拉伸性,并经得起最严苛的洗涤测试。
- 每个订单都由我们 50 多名专业设计师中的一位进行审查,以确保正确和优化的打印,如果您在结账时给我们留下备注,我们能够协助您去除背景或进行其他清理工作。
- 每个订单都保证 100% 满意,否则我们将为您重新打印您的订单!
And now also offering & in checkout
Product Details
我们的 PermaStickers 采用顶级 UV DTF 打印技术精制而成,色彩鲜艳,即使暴露在阳光和恶劣的天气条件下也不会随着时间的推移而褪色。
卓越的粘合剂可确保您的 UV DTF 转印纸保持牢固笔记本电脑,水瓶,车窗, 和更多。我们的 UV DTF 组合板材非常适合硬质商品,可以为您提供更多,更少!
我们的 UV DTF 组合板为多种贴花和贴纸提供充足的空间,并创建定制设计、个性化消息或色彩鲜艳的复杂艺术品。可用洗碗机清洗、防刮且高品质。立即使用 Ninja Transfers 在组板上设计和订购定制 UV DTF 转印。
区别与免责声明
PermaStickers 非常耐用、不褪色、耐碎裂和耐候贴纸/贴花,但根据条件和环境,它们仍然会磨损或失去附着力。因此,我们无法做出任何保证或保证,并且不应将其用于关键任务应用程序或设备。
Features
- 无与伦比的粘合剂性能:使用我们的 UV DTF PermaStickers 体验粘合剂创新的巅峰。这些贴纸旨在保持原样,以令人难以置信的附着力为笔记本电脑、水瓶、车窗等物品增光添彩。
- 卓越的耐用性:我们的 PermaStickers 将尖端的 UV DTF 技术与无与伦比的粘合性能相结合,经得起时间的考验,为您的设计提供无与伦比的耐用性。
- 持久的鲜艳色彩:我们的 PermaStickers 采用最先进的 UV DTF 印刷技术制作而成,色彩鲜艳,即使暴露在阳光和恶劣的天气条件下,也不会随着时间的推移而褪色。
- 可用于微波炉和洗碗机:享受毫不妥协的便利。我们的 PermaStickers 不仅充满活力且耐用,而且可用微波炉和洗碗机清洗,确保您的设计保持完整和生动。
Satisfaction Guarantee
We stand behind the quality of the transfers we print for you. If you are not satisfied, we will reprint with a new or revised file at no additional charge.
Application Instructions
Click here to watch our UV DTF PermaStickers™ Application Instructions Tutorial Video.
To ensure your PermaStickers™ adhere correctly, follow these four simple steps.
1. Prep Your Surface and Pre-Squeegee Your PermaSticker
Prepping the Area - Clean the surface of your item before applying the PermaSticker using either soap & water or a mixture of rubbing alcohol and water (50/50 mix). The cleaner the surface, the more permanent to natural elements and wear and tear.
Pre-Squeegee - After cutting out your PermaSticker, place the design face down with the white side facing up. Using the padded end of the included squeegee or credit card, run over it with hard pressure, back and forth 3-5 times. This forces the design onto the clear carrier sheet.
2. Separating The Clear Carrier Sheet From The White Backing
Separate the clear carrier sheet from the white backing by making a small tear. Do not tear near the design. Next, SLOWLY separate the clear carrier sheet from the white backing. We have a saying in the dojo - Don’t use your hands, use your EYES. This ensures every piece of your design is lifting onto the clear carrier sheet. If it’s not, set it back down, squeegee again, and try pulling that specific area which didn’t lift from a different side. The more thin and separated design elements there are, such as small text, the slower you should peel. The larger the design elements, the less careful you need to be. You will get a feel for it as you continue to work with our PermaStickers.
3. Placing your PermaSticker Onto Your Item
First, identify the placement area on your item. Then lay the design down starting from one side and ending at the other. This will help control your placement, reduce bubbles underneath the design, and avoid wrinkling of the carrier sheet which could cause design elements being offset and/or design overlapping. Tip: Leave an edge of the carrier sheet lifted, aka “dog-eared”, so you can easily grip it.
4. Completing The Transfer Process
After placing, use the padded end of the squeegee to run over it with hard pressure, back and forth 3-5 times. This forces adhesion to your item. Don’t squeegee over the “dog-eared” edge to retain something to grip. You are now ready to SLOWLY peel. Again, use your eyes while you peel to ensure every element of your design remains on your item. While peeling, move your grip inward to maintain a controlled peel. If all
elements do not transfer, you can lay the clear carrier sheet back down, squeegee hard again, and try pulling that specific area which didn’t lift from a different side.
Shipping & Returns
All orders ship out the same or next business day. Orders over $75 will automatically qualify for Free Shipping. Express shipping options using Rush Delivery and our Guaranteed Delivery option UPS Next Day Air Saver® available at checkout.
Read our Shipping Policy for more information.
Refunds & Reprints
Contact us within 45 days of receiving your order to submit a request for a refund or reprint. We will reprint any order where there is a print quality or adherence issue. However, we will not issue a reprint if the uploaded file is low quality. If you'd like a refund or reprint for another reason, it must be approved by management first.
Art Upload Recommendations
All file types accepted, vector files are always preferred, raster art should be at least 300 dpi.
Downloadable Templates
- 22" x 6 Inches - AI / PDF / Build With Ninja Gang Sheet Builder
- 22" x 1 Foot - AI / PDF / Build With Ninja Gang Sheet Builder
- 22" x 2 Feet - AI / PDF / Build With Ninja Gang Sheet Builder
- 22" x 5 Feet - AI / PDF / Build With Ninja Gang Sheet Builder
- 22" x 10 Feet - AI / PDF / Build With NInja Gang Sheet Builder
- 22" x 20 Feet - AI / PDF / Build With Ninja Gang Sheet Builder


