Pressing DTF transfers with an iron or handheld heat press requires accurate temperature control. Too cool, and your transfer won't stick properly. Too hot, and you risk scorching your garment. But household irons have varied settings, and handheld presses like Cricut typically offer just three heat levels—so how do you know if you're hitting the right temperature?
This matters whether you're crafting at home or running a small business. Even users with tabletop heat presses, which display specific temperatures, can benefit from verifying their actual operating temperature. Getting it right prevents incomplete transfers that require repressing and protects your garments from heat damage. In this guide, we show you two simple methods to test your device's temperature and share tips for achieving consistent results.

Table Of Contents
- How To Check The Temperature: The Short Answer
- Temperature Test Strips
- Using Temperature Strips To Test An Iron
- Using Temperature Strips To Test A Handheld Heat Press
- Using Temperature Strips To Test A Tabletop Heat Press
- Infrared Thermometer
- Using An Infrared Thermometer To Test An Iron Or Handheld Heat Press
- Using An Infrared Thermometer To Test A Tabletop Heat Press
- Temperature Tips For Home Iron Or Handheld Heat Press
- Pressing Perfect DTF Transfers: Temperature Matters
How To Check The Temperature: The Short Answer
There are two easy ways to verify your heat press temperature: temperature test strips or an infrared thermometer. Both tools are affordable (around $20–$30) and help ensure your device hits the mark.
Temperature Test Strips
Temperature test strips serve as disposable thermometers. Originally designed for screen printing, they are equally effective for heat pressing. These small strips feature temperature-sensitive squares that turn black when they reach specific heat levels.
The strips come in packs of 16 and cost around $25. We recommend the Paper Thermometer brand, which offers clear temperature indicators and reliable results. Each strip displays five temperature readings from 290°F to 330°F, making them perfect for dialing in the optimal 310°F needed for DTF transfers.
Pros and cons: Test strips offer slightly better accuracy than infrared thermometers because you can simulate actual pressing conditions. However, each strip can only be used once, so you'll need to stock up if you test temperatures frequently.

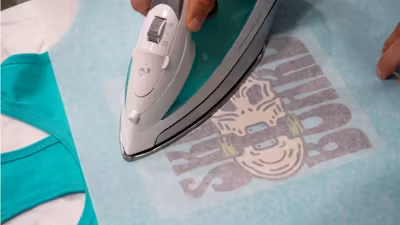
Using Temperature Strips To Test An Iron
- Start your iron on its “high” setting (typically 4+) and let it heat up for 5 minutes.
- Place a test fabric (like a t-shirt) on your heat-resistant pressing surface and press for 10–15 seconds to warm it up.
- Place a single temperature strip on a sheet of paper and place it face-down on your test fabric. Never press the iron directly onto the strip.
- Press down with the iron on top of the paper for 15 seconds.
- Check which square turned the darkest black. If you haven’t hit 310°F, increase the iron setting and test again. If you’ve gone over, decrease and retest.
- Once you find the right setting, mark it with tape or a permanent marker on your iron’s dial.
Using Temperature Strips To Test A Handheld Heat Press
- Handheld presses like the Cricut typically offer three heat settings, with “medium” designed to hit 300–350°F. Testing verifies your device operates correctly.
- Place a test fabric on your pressing surface and warm it up with a 15-second press.
- Position a temperature strip on paper and place it face-down on your test fabric.
- Press for 15 seconds using your medium setting.
- Check the strip results. If you haven’t reached 310°F, test the high setting. If you’re running too hot, try the low setting.
- Write down which setting works best for DTF transfers on your specific device.
Using Temperature Strips To Test A Tabletop Heat Press
- While tabletop presses display specific temperatures, cheaper models may read incorrectly or heat unevenly across the platen. Test with five strips to check both accuracy and heat distribution.
- Place temperature strips on five separate pieces of paper and warm up your test fabric with a 15-second press.
- Position the papers with strips face-down in all four corners (not at the edges) and the center of your test fabric. The paper can overlap slightly.
- Press for 15 seconds at your target temperature (310°F for DTF).
- Check all five strips—they should show consistent readings. Variations indicate uneven heating or inaccurate temperature settings.
- If your digital display doesn’t match the strip readings, adjust your temperature setting to compensate. Major inconsistencies across the platen may signal it’s time for a new heat press machine.
Infrared Thermometer
An infrared thermometer provides instant temperature readings without contact. These handheld devices project a laser point to help you aim at specific spots on your heat press surface, then provide a quick digital readout.
Most infrared thermometers suitable for heat pressing cost between $20 and $35. Look for models that measure up to at least 400°F and feature a backlit display for easy reading. Here is one high-rated example.
Pros and cons: Infrared thermometers are fast and reusable, making them great for frequent testing. However, they can be slightly less accurate than test strips because they measure surface temperature rather than simulating heat transfer under pressure.

Using An Infrared Thermometer To Test An Iron Or Handheld Heat Press
- Point the infrared thermometer at your heated iron or press surface from about 14 inches away for an instant temperature reading.
- For a more practical test, press a piece of paper on your test fabric for 15 seconds, then immediately check the temperature of the pressed area.
- The actual operating temperature likely falls between your direct surface reading and the pressed paper reading.
- Test different heat settings until you find the right one, then mark or note that setting for future use.
- When testing handheld presses, check each heat level to confirm which setting best achieves your target of 310°F.
Using An Infrared Thermometer To Test A Tabletop Heat Press
- Set your press to 310°F and let it fully heat up. Position the thermometer about 14 inches from the surface.
- Take readings from five points on the upper platen: all four corners and the center.
- For an alternative test, press a large piece of parchment paper or protective guard sheet, then immediately check those same five points.
- You may need multiple presses since heat dissipates quickly from paper. Work systematically for accurate readings.
- Compare your thermometer readings to the press's digital display and note any difference so you can adjust your settings.
Temperature Tips For Home Iron Or Handheld Heat Press
- Aim for 310°F. It’s generally better to run slightly hot than too cool.
- If parts of your design aren’t sticking, check temperature before assuming it’s a pressure issue.
- Always use a protective guard sheet or parchment paper to prevent scorching, especially on delicate materials.
- When pressing near buttons, zippers, seams, or pockets, use heat press pillows to create an even surface and maintain consistent pressure.
- Silicone application pads help protect garments and distribute heat evenly, but remember to increase temperature and pressure to compensate for the extra layer.
- Test your temperature periodically, especially when switching garment types or if you notice changes in results.

Pressing Perfect DTF Transfers: Temperature Matters
Your success with DTF transfers depends on maintaining the right temperature. Whether you choose temperature test strips for their precision or an infrared thermometer for its reusability, regular testing helps you dial in your settings and achieve consistent results.
Make sure to read our tutorials on using a home iron and applying DTF transfers with a Cricut. Take time to test and mark your ideal settings. This small investment in preparation prevents wasted materials and ensures professional-quality transfers every time.
When you're ready to start printing, trust Ninja Transfers for high-quality DTF transfers and essential supplies. For one-stop shopping, Ninja Blanks carries high-quality blank apparel that's perfect for heat pressing. With the right temperature and a little practice, you'll be creating professional-quality custom apparel from your first press to your hundredth.