Are you ready to transform your apparel into something truly eye-catching? Imagine creating designs that not only stand out but also stay perfectly positioned and sized.
Transfers are a fun, vibrant and effective way to customize apparel, but sizing and placing graphics are critical to producing an attractive product.
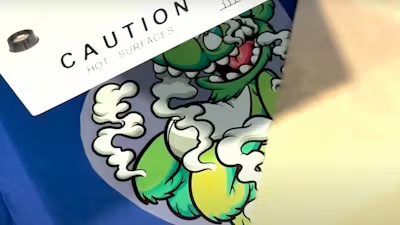
Whether you're using HTV, classic vinyl, or DTF transfers, established industry standards will help you get the best results.
To help you produce flawless custom apparel, we've prepared this guide featuring the most common heat transfer placements, sizing standards, and our expert tips.
Table Of Contents
- Heat Transfer Terminology
- DTF Transfer Sizing And Placement
- Size & Print DTF Transfers Carefully For Best Results
Heat Transfer Terminology
Before diving into the sizing and placement of heat transfers, an understanding of these basic terms will help you avoid confusion.
-
Print location - This refers to the location on the garment or the category of print (left chest print, full back print). Placement and print area can vary within the print location.
-
Print placement - The exact place the design is positioned. This typically varies by a few inches or more, depending on the size of the garment, preference, and other factors.
-
Print area - Specifically, it's the surface area of the fabric that the ink, vinyl, or decal will cover. It’s essential for pockets, seams, buttons, etc.
-
Print size - The exact measurement of the artwork. Print size combined with placement will dictate the print area. Does not include film size of heat transfers, vinyl, and decals.
-
Standard size – Each print location has a standard or common range of sizes. This can vary slightly between adult, ladies, and youth size garments. Use it as a starting point.
-
Oversize - Anything bigger than standard but less than maximum.
-
Maximum size - The maximum size that can be printed on a particular garment.
- Anchor point - The point on the design that should be centered rather than the midpoint. This is useful for identifying on designs that are not naturally symmetrical.
DTF Transfer Sizing And Placement
We have decades of experience in creating custom apparel and specifically in the size and placement of heat transfers like DTF transfers. Through this experience, we've determined that there are common heat transfer sizes, placement locations and tricks that will make your apparel look its best.
1. Left Chest
The classic left chest placement is back in style. It's small, modest, and the go to for providing logo shirts for employees, and staff for an event or simply as a stylish option for any custom apparel you're creating. A left chest design can also be paired with a full back design - particularly common for skater communities. One drawback to this placement is the design can be hidden when wearing a jacket or zip hoodie.

- Size range: 2.5"-4.5" w, 2.5"-4.5" h
- Average size: 3.5" w x 2" h adult, 2.5"w x 1.5"h youth
- Standard placement: Approx. 3" down from the bottom of the collar, centered at the edge of the collar, or 4-6" over from the centerline
- Alternative placement: Right chest is less typical, but sometimes used
Pro tip: Printing on pocket tees is an option, and typically the logo goes above the pocket, a higher placement than normal. If you want to print on the pocket, keep the design smaller than 3"x 3"h.
2. Center Chest
Exactly where you'd expect it, Center Chest is located just below the collar and centered across the chest. This is a moderately sized print, so it's almost always fully visible, even if someone is wearing a jacket, hoodie, or open button-down shirt. Superman's famous "S" is a Center Chest.

- Size range: 6"-10" w, 2"-10" h
- Average size: 8" w x 4" h adult, 6"w x 3"h youth
- Standard placement: 3" down (4 fingers) from the bottom of the collar, centered.
- Alternative placement: A small center chest size print can also go on the bottom left or right.
Pro tip: If your garment sizes range all the way from youth to adult 3XL, you may want to consider using two different print sizes so your design will look proportional. A center chest can look large on extra small shirts and small on extra large ones.
3. Full Front
Probably the most common print placement is the Full Front. This size is larger than a Center Chest but not completely maxed out. It's great for featuring artistic graphics, like a concert tee. It may be too big for logos and designs with much coverage (consider a Center Chest instead). This can be particularly useful for intricate designs that need the extra space to really show off all of the details.

- Size range: 10"-12" w, 10"-14" h
- Average size: 11" w x 11" h adult, 9"w x 9"h youth
- Standard placement: 3" down (4 fingers) from the bottom of the collar
- Alternative placement: Full Back with a Left Chest on the front
Pro tip: If your design isn't very tall, you can print it wider, up to 14". If it's a square or circle, consider reducing the overall size. Think about print area similar to the square footage of a house. Too much coverage results in a heavy print that's not breathable, also known as a "sweat patch."
4. Sleeve (Left Or Right)
This list would not be complete without the Sleeve. Like the Left Chest or Collar, reserve this print placement for more simplified artwork. And like the other placements, the size and placement should depend on your particular logo or design. Generally, sleeve prints look better at small size.

- Size range: 1"-3.5" w, 1"-3.5" h
- Average size: 2.5" w x 1" h adult, 1.5"w x 1"h youth
- Standard placement: Approx. 1" above the top edge of the seam, centered.
- Alternative placement: On the shoulder can work well for circular designs
Pro tip: If you're already printing a Left Chest on the shirt and are adding a sleeve print, choose the right sleeve to balance it out. Otherwise, either sleeve will work. Bonus tip: An American flag on the sleeve should always have the stars facing toward the front.
5. Collar / Small Upper Back
After initially starting as an alternative location, the collar placement has become a standard. Logos and designs can be printed very small in this placement. You may notice this print placement while waiting in line behind someone. Also works well for the small area on racerback tank tops.

- Size range: 1"-3"w, 1"-3"h
- Average size: 2"w x 2"h adult, 1.5"w x 1.5"h youth
- Standard placement: Approx. 1"-2" down from the back collar, centered.
- Alternative placement: A front print in the same location is called "medallion."
Pro tip: You can combine a Full Back with a Back Collar in a single print. Set up the artwork, so there is a space between the two designs–about 2 or 3 inches, depending on the design. The rest of the design will end up where a normal Full Back would be.
6. Upper Back
An Upper Back print placement is often simply called "Back," but the critical distinction is that the placement goes up across the shoulder blades rather than vertically centered. This is typically where you will see the bold words "SECURITY," "EVENT STAFF," or the hashtag of the moment. Larger logos also work well.

- Size range: 10"-14" w, 2"-6" h
- Average size: 12" w x 4" h adult, 10"w x 2.5"h youth
- Standard placement: Approx. 4" down from collar (rather than a front print), centered.
- Alternative placement: Across the butt, near the bottom hem. The tradeoff is less visibility.
Pro tip: If your text is at the maximum width and doesn't look big enough, consider using a taller font rather than stretching the font to be taller (which distorts it and makes it less legible). Look for any font with "Bold Extra Compressed" in the title, or a font that is naturally tall, such as "Impact."
7. Full Back
The Full Back is another common location. Similar to the Full Front, but usually larger and printed slightly lower. This print placement rarely exists on its own and is usually complemented by a print on the front. It's a great place to put your most colorful, elaborate designs and save simple ones for other locations.

- Size range: 11"-13" w, 13"-15" h
- Average size: 12" w x 14" h adult, 10"w x 12"h youth
- Standard placement: Approx. 4" down from the bottom of the collar, centered
Pro tip: If you're making T-shirts for an event and have sponsor logos to be printed, sponsorship levels are often represented by tiers. The logos at the top of the shirt are the largest and most prominent (highest-tier sponsors), with the logos below that are sized at smaller tiers.
8. Oversize Front/Back
Anything bigger than a standard-sized Full Front or Full Back is an Oversized print. Keep in mind restrictions due to garment size before setting up your design. For example, oversized prints don't fit youth, more petite ladies' sizes, tank tops, v-necks, etc. In those cases, use different print sizes.

- Size range: 12"-15" w, 14"-16" h
- Average size: 13" w x 15" h adult, 10"w x 12"h youth
- Standard placement: Approx. 2" down (3 fingers) from the bottom of the collar, centered
Pro tip: Print out your design at full desired size using your home or office printer. You can "tile" the design (one of the print options), then tape the pages together, cut off the edges, and place on the garment to be printed to see if it fits in real life.
Size & Print DTF Transfers Carefully For Best Results
DTF transfers and other types of heat transfers can produce excellent results, but they must be sized and placed carefully. Use these standard guidelines to ensure that your customized apparel achieves is maximum potential.