Never mess up another garment by following Ninja Transfers’ DTF pressing process. From hats to safety wear, to bags and jackets. DTF transfers are the solution to your impossible to print items.
Getting Started With Pressing DTF Transfers
There are a few things to keep in mind when getting started:
- Time: 10-15 seconds
- Temperature: 300-320 degrees
- Pressure: Medium to Medium Firm
Pro Tip: If you’re using durable materials like 100% cotton or polyester then the temperature setting should sit at the higher end of the spectrum. If you’re using blends, nylon, or other less durable materials, then the temperature setting should be closer to 300.
Always find what works best for you and your personal set up.
Before you get started, make sure that your heat press is fully heated up and ready to go to ensure consistent results with every press.
We highly recommend a number of accessories to make the pressing process as quick and painless as possible:
- Silicone Upper Platen Cover & Garment Protector
Steps To Get The Perfect Press
We’ve outlined the steps you need to follow to get the perfect press every time.
Step One:
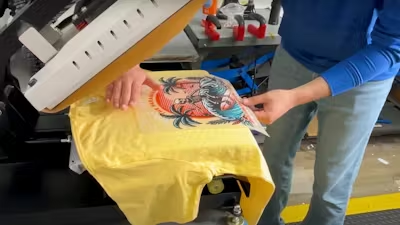
Line up the transfer with the garment. Use an alignment ruler kit to ensure everything is precise. Once you’re happy with how everything is lined up, make sure to remove the alignment kit before pressing.
Step Two:
There are now two options - you can use a protective guard sheet over the transfer and garment to avoid any potential scorch marks and simply to provide a barrier between the garment and the heat. Alternatively, you can proceed without the guard sheet.
Step Three:
Press down - set to 320 for about 15 seconds, depending on the material you are pressing on.
Step Four:
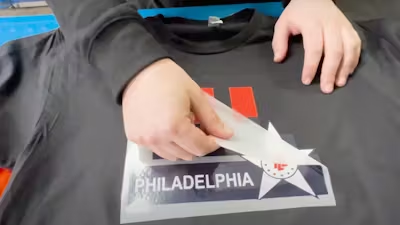
Wait a few seconds (or longer) before peeling. If any portion of the design does not adhere properly, place it back down and apply additional pressure and heat, increasing the temperature by 15°F. If needed, continue increasing the heat in 15°F increments until the transfer is successful. One advantage of Ninja Transfers is that repeated pressing will not harm the transfer.
Step Five:
To give it a nice matte finish, we recommend a second press. Add the protective guard sheet or parchment paper on top of the transfer and press again. Once pressed, it’s ready to wear!
Pro Tip: If you’re pressing onto a hat, we recommend using our thermal heat tape to secure the transfer in place before pressing. This will help to ensure that it does not move during the pressing process.


