Designing DTF gang sheets should be straightforward, but it's common to hit some speed bumps along the way. These challenges can slow down your workflow, whether you're trying to figure out file types, struggling with resolutions, or puzzling over the best way to arrange your designs. Let's tackle the eight most common issues you might face when creating gang sheets and walk through practical solutions to keep your projects running smoothly. Join the gang sheet gang today-this is your initiation.
Table Of Contents
- What Are Gang Sheets?
- How To Set Up a Gang Sheet
- Common Challenges and Solutions
- 1. Planning Ahead
- 2. File Types
- 3. Color Modes
- 4. Resolution and Scaling
- 5. Background Removal
- 6. Spacing and Arrangement
- 7. Variation and Experimentation
- 8. Fitting Larger Sizes
- Conclusion: Join The Gang

What Are Gang Sheets?
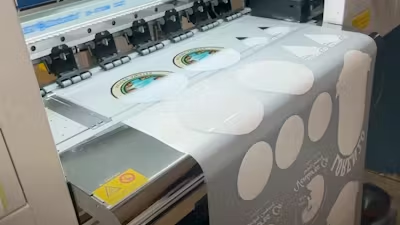
Gang sheets are large-format DTF transfers that let you print multiple designs at once. Instead of ordering individual transfers, you can arrange several designs on a single sheet-from small left-chest logos to full-back prints. These sheets come in various lengths (while maintaining a 22-inch width) to accommodate different amounts of artwork.
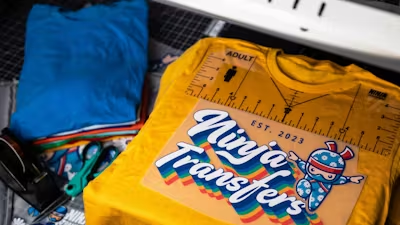
Using gang sheets offers several practical advantages for your custom apparel business. You'll save money since combined printing costs less than individual transfers. They're easier to organize and store than loose transfers, and you can experiment with different size combinations on one sheet. Want to test how your design looks at various sizes or try different color variations? Gang sheets make it simple to print multiple versions at once.
You can apply special effects to your entire gang sheet for extra creative possibilities. Options like glow-in-the-dark and glitter films add striking visual elements across all designs on the sheet. The glow effect appears more intensely in lighter areas while remaining subtle in darker regions, while glitter provides consistent sparkle throughout your designs.

How To Set Up a Gang Sheet
There are two main approaches to creating gang sheets for your DTF transfers. For beginners or those who prefer a streamlined process, our Gang Sheet Builder offers an intuitive web-based solution. But if you're experienced with graphic design software, you can create your own print-ready files to upload. First, let's look at how the Gang Sheet Builder works.
Gang Sheet Builder
Our Gang Sheet Builder takes the complexity out of arranging multiple designs. This built-in web app accepts all major file types, including PNG, PSD, AI, EPS, PDF, and JPEG, giving you flexibility with your artwork sources. The standout feature is Auto-Build: Simply upload multiple designs at once, and the builder automatically arranges them efficiently on your sheet.
Working with the builder is straightforward: follow the prompts to upload your artwork, adjust sizes, and position your designs. You can easily drag designs around, resize them, or create duplicates. The builder also includes handy features like a text tool for adding names and numbers, plus a library of stock art elements to enhance your designs. This makes it simple to create professional layouts even if you're new to gang sheets.

Upload Your Own
Creating your own gang sheet offers more control and flexibility for designers who are comfortable with professional graphics software. Using programs like Adobe Illustrator or Photoshop, you can build a print-ready file that matches your vision. This method works best if you're already familiar with design software and understand how to set up files for printing.
When creating your own gang sheet, vector formats like AI, EPS, or PDF are ideal. These formats ensure your designs stay crisp and clear at any size and are optimized for professional printing. Plus, keeping your own master file makes it easy to adjust designs, update text, or modify arrangements for future orders-something you'll appreciate as your business grows.

Common Challenges and Solutions
Now that we've covered the basics let's tackle the most common challenges you might face when designing gang sheets. Each has a straightforward solution that will help you avoid mistakes and create more efficient layouts.
1. Planning Ahead
Challenge: Diving into gang sheet design without proper planning often leads to wasted space and inefficient layouts. You might rearrange designs multiple times or realize too late that your artwork isn't ready for printing. This can turn what should be a time-saving process into frustration.
Solution: Before opening any design software or the Gang Sheet Builder, map out your project:
-
List every design you need and its required sizes
-
Prepare all artwork files in advance, ensuring they're print-ready
-
Consider which designs might work well together based on size and shape
-
Calculate the minimum sheet length needed to print all your designs
This preparation helps you maximize space usage and avoid the need for last-minute adjustments. If you're unsure about any aspect of the planning process, consulting with a print professional early can save time and prevent costly mistakes.
2. File Types
Challenge: Working with multiple file types can be confusing, especially when mixing formats across different designs. Maybe you have a logo in AI format, some JPG artwork, and a Canva design as a PDF. Without understanding which formats work best for DTF printing, you might end up with inconsistent print quality across your gang sheet.
Solution: Vector files are your best option whenever possible. Formats like AI, EPS, and PDF maintain crisp, clean edges at any size and naturally handle transparent backgrounds. Even better, vector files can contain raster elements like photographs-just ensure those embedded images are high resolution (300 DPI or higher).
Stick with PNG or PSD files for designs that must be in raster format. These formats support transparency and maintain good quality for photographic elements or gradients. If you're working with multiple file types and feeling overwhelmed, the Gang Sheet Builder can help streamline the process by accepting various formats and standardizing them for printing.
Quick file type guide:
-
Best: AI, EPS, PDF (vector formats)
-
Good: PNG, PSD (raster with transparency)
-
Workable: JPG, JPEG (convert from these when possible)
3. Color Modes
Challenge: Color mode confusion can lead to unexpected results in your DTF prints. You might have some files in RGB and others in CMYK and wonder which is correct. Or perhaps you're trying to achieve maximum vibrancy but aren't sure how to optimize your colors. Working with multiple files in different color modes can make predicting how your final prints will look even trickier.
Solution: Keep your design files in RGB mode for the best results. This is the color mode your computer monitor uses, and it offers the widest range of vibrant colors to work with. Whether you're creating vector graphics or working with raster images, RGB is the way to go. Don't convert your files to CMYK before uploading-this actually limits your color options and might reduce vibrancy.
Our art department handles the RGB to CMYK conversion using a specialized process calibrated with our in-house color profiles. This process ensures optimal color reproduction for DTF printing. If you're using the Gang Sheet Builder, it automatically handles color mode standardization across your files. After ordering, review your digital proof to see how your colors will print.
Color mode tips:
-
Work in RGB mode when creating or editing designs
-
Leave color mode conversion to the print professionals
-
Check your digital proof to confirm the colors
-
Avoid converting files to CMYK yourself
4. Resolution and Scaling
Challenge: Resolution issues can sneak up on you, especially when combining multiple files or scaling designs. A logo that looks crisp on your phone might turn blurry when sized up for a back print, or you might find yourself mixing files with different resolutions across your gang sheet.
Solution: Vector files are your first line of defense against resolution problems since they scale infinitely without losing quality. For raster artwork (like photographs or complex designs), maintain at least 300 DPI at your largest intended print size. While you can scale these files down without issues, scaling up often leads to blurriness. In some cases, 200 DPI might work for less detailed designs, but higher resolution is always better for professional results. Try our free Ninja Upscale tool for photographic elements.
Always maintain proportions when scaling. Stretching or squishing designs can make them look unprofessional and text harder to read. Most design software has a "constrain proportions" or "scale proportionally" option to help prevent distortion.
5. Background Removal
Challenge: Square backgrounds around your designs can ruin the professional look of your DTF transfers and waste valuable gang sheet space. JPEGs always include a background, and trying to remove backgrounds manually can be time-consuming and frustrating, especially when dealing with multiple designs.
Solution: Start with vector graphics whenever possible-they naturally handle transparency without any extra work. Save your files in PNG or PSD format for raster artwork, both of which support transparent backgrounds. Several options exist for removing backgrounds:
-
Use professional design software like Photoshop
-
Try our free online Background Removal Tool
-
Work with PNG files that already have transparency
-
Ask our art department for help with tricky backgrounds
|
Pro tip: Remember to check your designs against a dark and light background after removing the background. This helps ensure you haven't missed any spots and that semi-transparent edges like fades or gradients are clean and smooth. |
6. Spacing and Arrangement
Challenge: Finding the right balance between tight spacing (to maximize sheet usage) and adequate margins (for easy handling) can be tricky. Too little space between designs makes them difficult to separate and apply; too much space wastes valuable sheet area.
Solution: Follow these spacing guidelines for optimal results:
-
Minimum spacing: 1/2 inch margin around each design (1 inch between designs)
-
Recommended spacing: 1-inch margin around each design (2 inches between designs)
-
Avoid spacing larger than 2 inches between designs-it's wasted material
-
Never let designs overlap-this ruins both transfers
A strategic arrangement will maximize your sheet usage:
-
Nest odd-shaped designs together like puzzle pieces
-
Fill gaps between larger designs with smaller ones
-
Turn designs at different angles to fit better
-
Keep similar designs grouped together for easier organization
-
Consider the order of application when arranging multiple designs for the same garment
Remember that while tight spacing saves material, leaving comfortable margins makes your transfers easier to work with during application. Aim for achieving a healthy balance.
7. Variation and Experimentation
Challenge: Testing different versions of your designs-whether it's color variations, size options, or design tweaks-can get expensive and time-consuming when ordering individual transfers. You want to try multiple options without breaking the bank.
Solution: Gang sheets excel at experimentation, allowing you to print multiple variations in one go. Try different approaches:
-
Print the same design in multiple sizes to test what works best
-
Create color variations of a logo to compare options
-
Test slight design modifications side by side
-
Experiment with different special effects on similar designs
If you're using the Gang Sheet Builder, prepare your variations beforehand in your design software. For custom gang sheets in Illustrator or similar programs, you can create variations directly in your master file, making it easier to see how different versions compare. Just remember to keep your variations organized and labeled clearly on the sheet.
This experimental approach helps you:
-
Find the perfect size for different garment locations
-
Test color combinations before large orders
-
Compare design tweaks in actual print form
-
Save money while perfecting your designs
8. Fitting Larger Sizes
Challenge: You have wide designs (like 12-inch prints) and want to fit two side by side on your gang sheet. With the maximum sheet width of 22 inches, this creates a spatial puzzle that can seem impossible to solve at first.
Solution: Several approaches can help you work with larger designs:
-
Rotate designs sideways to take advantage of the sheet length instead of the width
-
Scale designs down to 10 inches wide to fit two across (remember, bigger isn't always better)
-
Keep a collection of smaller designs handy to fill empty spaces around large prints
-
Consider splitting your order across multiple sheets if you need to maintain larger sizes
Most designs look fine at moderate sizes. A 10-inch print sometimes has more impact than a 12-inch version. Smaller prints generally feel more comfortable on the garment and allow for better draping.
|
Pro tip: If you frequently work with large designs, start building a library of smaller complementary designs (like chest prints or sleeve designs) that can fill those otherwise empty spaces on your gang sheets. |

Join the Gang Sheet Gang
Creating effective gang sheets might seem daunting at first, but these challenges all have straightforward solutions. Start with good planning, use the right file types and settings, and pay attention to your layout strategy. Whether you choose the Gang Sheet Builder for its simplicity or prefer creating custom layouts in your design software, following these guidelines will help you maximize efficiency and achieve professional results.
Now that you've joined the gang, it's time to put your ideas into action. Ninja Transfers is your trusted partner for superior DTF gang sheets that deliver results. For the perfect canvas to showcase your transfers, count on Ninja Blanks for quality blank apparel that's ready to print. Your custom designs deserve the best foundation for success.