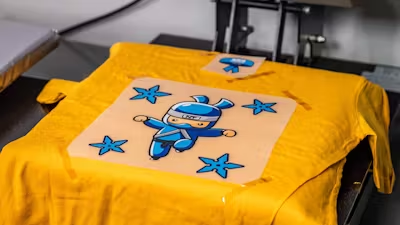
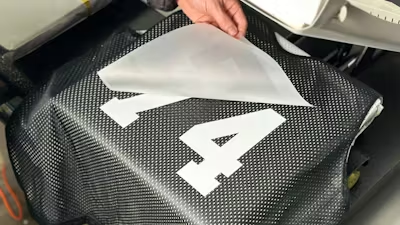
So you've got your DTF transfers and you're ready to press on both sides of a garment. Great idea. Whether you're making promotional tees, band merch, company shirts, team uniforms, or custom designs for your clothing brand, printing front and back will elevate your product.
This guide walks you through the process, covering common combinations, step-by-step instructions, and some handy tips to get professional-level results. Let's get into it.
Table Of Contents
- What You Need
- Common Front And Back Combinations
- Facts About Printing The Front And Back
- Steps For Printing DTF Transfers On Both Sides Of A Garment
- Tips For Printing On The Front And Back
- How To Print A Full Front DTF Transfer Over A Zipper
- Mastering Two-Sided DTF Printing

What You Need
Before you start printing on both sides of your garments, make sure you have the following items on hand ensure a smooth printing process and help you achieve professional results:
- Heat press machine
- DTF transfers printed with your designs
- Garments to print on
- Protective Guard Sheet or parchment paper
- Heat-resistant tape
- Heat press pillows (for items with zippers, buttons, or seams)
- Alignment ruler set
- Cool peel air blower (optional, but recommended)
- Exacto knife and cutting mat
- Timer (if not built into your heat press)
Common Front And Back Combinations
Before we guide you through the process, here are some popular front/back combinations for t-shirts, polos, hoodies and jackets you should be aware of. These pairings are tried-and-true in the custom apparel world, each serving different purposes and styles:
-
Left chest/full back
- Classic business and uniform style
- Typically 3-4" design on chest, 11-13" on back
- Great for company logos and promotional wear
-
Center chest/full back
- Balanced look for casual and promotional wear
- Usually 6-10" design on chest, 11-13" on back
- Popular for sports teams and event merchandise
-
Full front/full back
- Maximum impact design
- Both sides typically 10-14" designs
- Ideal for bold graphic tees and statement pieces
-
Full front/upper back (shoulders)
- Front 10-14", back typically 10-14" wide but only 2-6" tall
- Often used to designate event roles 'SECURITY' etc
-
Full front/back collar
- Subtle back detail with main focus on front
- Front 10-14", back usually 1-3" design
- Great for adding brand names or small logos to graphic tees

Facts About Printing The Front And Back
Here are some key facts about printing on both sides of a garment. These insights will help you make informed decisions and create higher-quality products for your t-shirt business.
- Value vs. cost - Printing both sides significantly increases the perceived value of your garment. However, it also doubles your production time and material costs. For retail items, this can justify a higher price point. For promotional wear like band merch, the extra visibility often outweighs the added expense.
- Business standard-For company shirts, the left chest/full back combination reigns supreme. It's professional and versatile, and it allows for a small logo on the front with more detailed information on the back. This setup works well for various industries and events.
- Size balance - When printing both sides, the front design is typically smaller than the back, even for full-size prints. This visual balance prevents the front from appearing overwhelming while allowing for a bolder statement on the back. For example, a center chest print might be 8-10" wide, while the back could be 11-13" wide.
- Zipper and button considerations - For garments with zippers or shirts with buttons, such as polos, opt for a left chest front print. Applying heat transfers over these elements can lead to poor adhesion and a subpar finish. However, we'll cover a special technique for full-front prints on zippered garments later in this article.
- Fabric weight matters - Be cautious when printing large designs on both sides of lightweight shirts. The added ink can weigh down the garment and affect its breathability. For thinner fabrics, consider using smaller designs, designs with less surface area, or limiting full-size prints to one side only.
- Placement precision - Standard print placements can vary based on design size and garment type. We highly recommend using a DTF Alignment Ruler Set or a ruler and knowing the standard print placements and sizes.
- Team uniforms - DTF transfers are excellent for creating custom team uniforms. You can easily print the team logo on the front and add player names and numbers on the back. The durability of DTF transfers makes them ideal for sportswear that needs to withstand frequent washing.
- Event shirts - For event merchandise, there's a tried-and-true format: artwork or logo on the front, event details on the back. This works great for band tour shirts (album art front, tour dates back) or charity events (event logo front, sponsor details back).

Steps For Printing DTF Transfers On Both Sides Of A Garment
- Position your design - Place your transfer in the desired location on the garment. Ensure there are no large wrinkles underneath. For precise placement, use a ruler or alignment set along with Thermal Heat Tape to secure the transfer, especially when working with hats or using a household iron.
- Prepare for pressing - Set your heat press to 310°F / 155°C and adjust to medium-high pressure. Place a sheet of parchment paper or a Protective Guard Sheet over the transfer to protect the garment from direct contact with the heat press.
- Press the transfer - Apply pressure for approximately 13 seconds. Remember, it's always best to test on one piece first. You can't damage the transfer with more heat, pressure, or time, but you could potentially scorch the garment. Learn how to prevent scorch marks on various fabrics.
- Cool and peel - After pressing, allow the transfer to cool until it's comfortable to touch (about 15-30 seconds). Use a Cool Peel Air Blower to accelerate the process. Peel the backing slowly, and "peel with your eyes," ensuring every part of your design adheres to the garment. If any areas aren't sticking, reapply the backing and press again.
- Final press - Once the design is transferred and the backing is removed, cover the design with parchment paper or a single layer of t-shirt material. Press again for about 15 seconds. This crucial step enhances durability, improves softness, and reduces shine. Learn more about reducing the plastic feel of DTF transfers.
That's all there is to it. Now, repeat these steps for the other side of the garment, ensuring the first print is protected from direct heat during the second application.

Tips For Printing On The Front And Back
Tips for printing on the front and back
- Allow the garment to cool completely before printing on the other side. This prevents any damage to the fabric or the first print from residual heat. If doing a run of shirts, print all the fronts first and stack them as you go, then print all of the backs (or vice versa).
- If pressing the other side immediately, you can use parchment paper between layers of fabric to protect the first print from re-heating. There are also thin, rubber thermal pads that can be useful.
- For garments with buttons, zippers, or pockets, use a Heat Press Pillow or folded parchment paper to smooth out the surface. This is especially useful when printing on the upper back or collar area.
- When printing left chest designs, don't eyeball it unless you know what you're doing. It's a common mistake to print this location too low or too far from the center. Refer to our DTF Transfer Placement Guide for precise, professional-looking results.
- For full-zip hoodies, unzip and drape the front sides over the edges of the heat press platen. This allows you to press only the back material, avoiding issues with the zipper.
- Before starting a batch of prints, plan out your entire process. Know the order of garments, print locations, and potential challenges. If possible, do a test print on the most complex item first.

How To Print A Full Front DTF Transfer Over A Zipper
While it's generally advised to avoid printing over zippers, it can be done. Here's a technique to get a clean full front print on a zippered garment:
- Prepare the design - Cut the transfer design in half vertically using a precision knife and a ruler on a self-healing cutting mat. Alternatively, you can "cut" the design in half in your design file. You will still need to cut the film to separate the pieces. It's okay to leave a small margin of film that will overlap the zipper gap.
- Set up the garment - Lay the fully zipped hoodie over the heat press platen, smoothing out any wrinkles. Place a large heat press pillow underneath the zipper to create a cushioned surface.
- Position the transfer - Carefully place the two halves of the transfer side by side on the garment, leaving a small gap for the zipper. Use heat tape to ensure perfect alignment.
- Mind the zipper - Even if using a heat press pillow, check that the type of zipper and the seams are not protruding too much. Certain hoodies may not be appropriate for this in the way they are constructed. Some hoodies have a fabric lip covering the zipper, which is ideal for this technique.
- Press the transfer - Follow the standard pressing instructions, being mindful of potential heat differences near the zipper area.
- Peel and finish - After cooling, peel the transfer backing carefully. Pay extra attention to the area around the zipper to ensure proper adhesion.
|
Pro tip: If you frequently print on zippered hoodies, consider investing in a specialized bottom platen pad with a slight indented line down the center. This allows the zipper to rest in the groove, providing a flat surface for pressing. Alternatively, if you're handy, you can modify a standard flat pad by carefully cutting a shallow channel (about a quarter inch deep) down the middle. This DIY solution can significantly improve your results when printing over zippers, ensuring more even pressure distribution and better transfer adhesion. |

Mastering Two-Sided DTF Printing
To wrap up, pressing DTF transfers on both the front and back of garments opens up a world of creative possibilities. With the techniques and tips we've covered, you're well-equipped to produce professional-quality custom apparel that stands out from the crowd. For more information and tips, check out the knowledge base at Ninja University.
Remember, practice makes perfect. Don't be afraid to experiment with different combinations and techniques to find what works best for your designs and target market. As you refine your skills, you'll develop an intuitive feel for the process, leading to faster production times and consistently great results.
For all your DTF transfer needs, from high-quality transfers to essential supplies, Ninja Transfers is your go-to resource. And if you're looking for premium blank garments to showcase your designs, explore Ninja Blanks for a seamless, one-stop shopping experience. With these tools at your disposal, you're ready to elevate your custom apparel game and bring your creative visions to life.


