Understanding how to properly scale in design is crucial for printing your Direct-to-Film (DTF) designs on larger garments without compromising quality. What looks great on a small shirt might seem tiny or out of place on an XL or 2XL. Plus, you have to be careful that your resized design file will maintain a high quality for print. Knowing how to scale your DTF designs effectively for different garment sizes is crucial to avoid awkwardly sized, stretched, distorted, or low-quality prints.
The good news is that DTF printing allows you to easily adjust the size of your designs. This is a significant advantage over other print methods like screen printing or DTG, where you're usually stuck with one size for all. This guide covers how to scale your designs accurately for various garment sizes while ensuring a high-quality print. Let's jump in.
Table of Contents
- What Is Scaling Up? (AKA Upscaling)
- How to Scale Up Your Design
- Issues With Scaling Up
- Vector vs. Raster Files
- How to Scale Up a Small or Low-Resolution Graphic File
- Typical DTF Design Sizes
- Print Sizes by Garment Type
- Tips for Scaling Your Designs for Different Sizes
- Perfecting Your DTF Designs for All Sizes

What Is Scaling Up? (AKA Upscaling)
Scaling up, or upscaling, refers to enlarging your design while keeping its proportions intact. In simpler terms, it means increasing the size of your design equally in all directions without changing its shape or aspect ratio. This is crucial to avoid distortion; you don't want your design to appear stretched or squashed.
When you upscale a graphic, the width and height should increase by the same percentage. This ensures that the design looks balanced and retains its original quality. For example, a design scaled up by 50% should have both its width and height increased by 50%, keeping the overall look consistent.

How to Scale Up Your Design
You'll need a graphics program like Adobe Illustrator or Photoshop to scale up your DTF design. Save a new file with your desired t-shirt graphic dimensions; maintain the aspect ratio, consider the print area, and use the appropriate file type (vector for best quality or high-resolution raster). Let's get into some details to consider if you want to make sure your upscaled design looks perfect.
Issues With Scaling Up
Scaling up your designs isn't just about making them bigger. A few critical factors should be considered to avoid blurry, distorted, or poorly fitting graphics. Here's a look at some common issues you might face when enlarging your DTF designs and how to address them.
Blurriness and distortion - Enlarging a design, especially a raster image, risks losing clarity. Raster graphics can become blurry when scaled beyond their original resolution. This is because the software has to interpolate the pixels, often producing a softened, less sharp image. All software is not created equal–so be sure to learn about the best software for DTF printing.
Aspect ratio problems - Locking the aspect ratio is crucial when scaling up. If you change the width more than the height or vice versa, your design can become stretched or squished, distorting its appearance. This problem can be a deal breaker if you're starting a t-shirt business.
Print area considerations - The size of your heat press platen and the garment's printable area set the limits for your design's size. Oversized designs might not fit properly on the platen, leading to incomplete transfers or uneven application.
Vector vs. Raster Files
Understanding the difference between vector and raster graphics is crucial when scaling up your DTF designs. Each file type handles resizing differently, significantly affecting your final print quality.
Vector Graphics: Worry-Free Scaling
Vector graphics are ideal for scaling DTF designs:
- Created using mathematical formulas defining points, lines, and curves
- Resolution-independent: can be enlarged to any size without losing quality
- Perfect for logos, text, and illustrations
- Common formats: .ai, .eps, .svg, .pdf
With vector files, scaling up is easy and worry-free. You can resize your design to fit any garment size without compromising quality. Always start with vector graphics for your DTF designs when possible. They guarantee sharp, detailed prints at any size.
Raster Graphics: Handle With Care
Raster graphics require more attention when scaling:
- Composed of a fixed number of pixels in a grid
- Enlarging creates new pixels, potentially causing blurriness or pixelation
- Common formats: .jpg, .png, .tiff, .psd
For significant size increases, we recommend having low-quality raster images recreated (retraced) as vector graphics. We explain more about handling raster images in the next section.

How to Scale Up a Small or Low-Resolution Graphic File
One of the most common challenges in DTF printing is dealing with small or low-resolution raster images. These are typically files with pixel-based formats like .jpg or .png that are not initially sized for large prints. Upscaling these without losing quality is tricky but essential for maintaining a sharp, professional look on larger garments. Here are several methods to help you enlarge your designs effectively.
Check for Higher-Resolution Versions
Double-check if a higher-resolution version exists before scaling up a low-resolution file. It's common to lose track of different versions of your artwork, especially if obtained from a third party or designer. Look for files with extensions like .ai, .eps, or .pdf, as these often allow you to adjust the DTF size for a shirt without losing quality.

Resize in Photoshop With Bicubic Resampling
For raster images, use photo editing software like Adobe Photoshop. When resizing, ensure the resampling method is set to 'Bicubic' rather than 'Nearest Neighbor.' Bicubic resampling is smoother and better for enlarging images, as it averages the pixels to reduce distortion. After resizing, use sharpening filters and adjustment tools to enhance the image's crispness. This works best with files with layers or "live" text, as these elements can scale more cleanly.
For more on adjusting your artwork, learn how to maximize vibrancy in your DTF prints.

Recreate in Illustrator (Vectorizing)
Another effective method is to recreate your design in a vector-based program like Adobe Illustrator. This process, known as "vectorizing," involves tracing over your raster image to create a new vector file. Vector files are scalable to any size without quality loss. If you're not comfortable with vector software, consider hiring a designer to do this. It's usually a cost-effective way to get a scalable version of your artwork.

Use Upscaling Software
Several specialized tools can enlarge raster images, but their effectiveness varies. Free software often doesn't outperform basic photo editing tools. However, advanced options like Topaz Labs Gigapixel use AI to upscale images and can be particularly good for photographic content. Even so, these tools might struggle with fine details like text or intricate lines, so they should be used cautiously for detailed graphics.

Typical DTF Design Sizes
Knowing the appropriate DTF sizes for shirts is key when scaling your designs to fit various garment dimensions. Here's how to determine the right dimensions for different sizes to make sure your prints look great on any shirt.
Heat Press Platen Size
The size of your heat press platen is the first limitation to consider. Most standard platens are 15" x 15", providing ample space for large prints. However, you should leave about an inch of buffer around the edges to ensure even pressure and avoid incomplete transfers. This means your maximum effective print area is approximately 14" x 14". This size is suitable for most XL to 3XL garments.
If you're in the market for a new heat press, read our guide on how to pick a heat press machine.

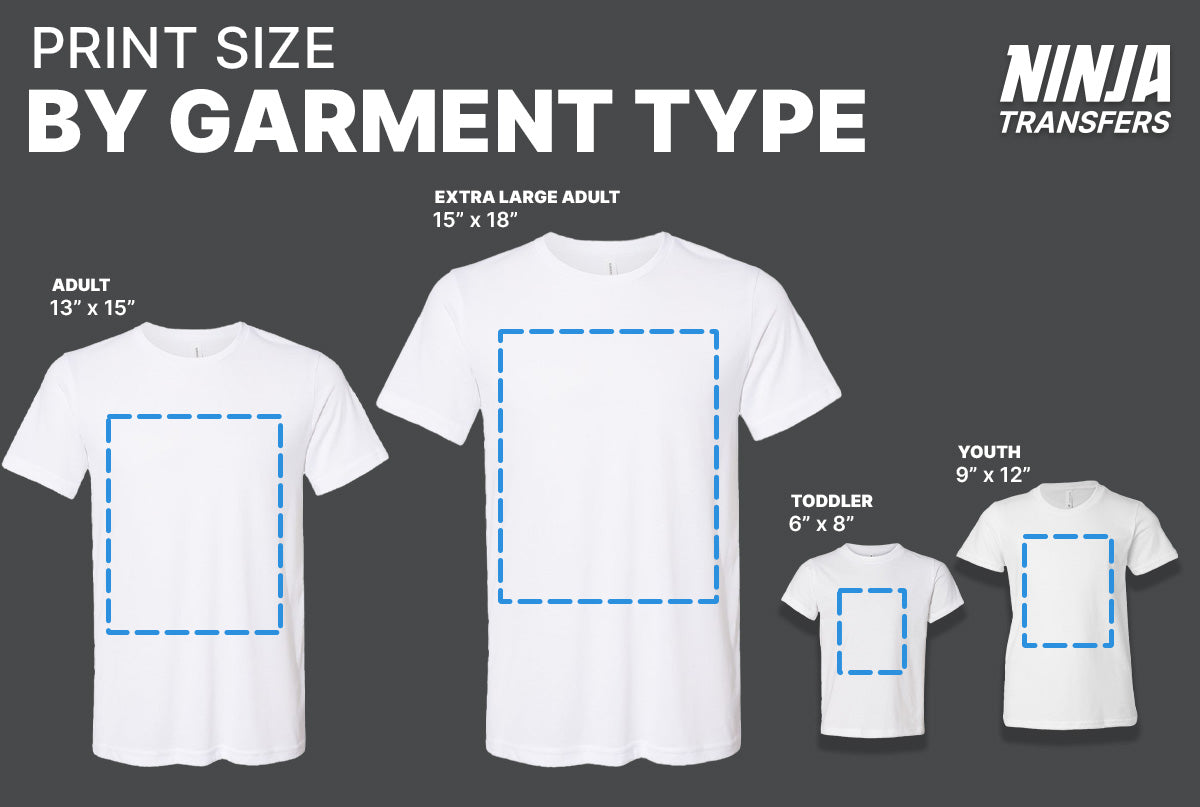
Print Sizes by Garment Type
Extra Large Adult Shirts (XL–3XL+): The largest shirts around have a maximum print area of about 15" x 18". This is a very large print and would require a 16" x 20" heat press. Considering t-shirt print dimensions, a more modest size for extra-large shirts would be around 13” wide.
Adult Shirts (Small to Large): For a standard adult shirt, the maximum dimensions for a t-shirt design typically range around 13" x 15". Depending on the type of design, this size fills out medium and large shirts and could look overwhelming on small. A more modestly sized design is around 10" wide.
Youth Shirts: Youth garments are a smaller canvas, with a maximum area of about 9" x 12". A print this size will look huge on smaller youth shirts. A more modest size is around 7–8" wide.
Toddler Shirts: These are very small items, with a maximum canvas area of approximately 6" x 8", if that. The modest-size print would be 3–5" wide. This keeps the graphic from overpowering the tiny garment and maintains a balanced look. This same size can be used as a left chest print on an adult shirt.
Tips for Scaling Your Designs for Different Sizes
Successfully scaling your DTF sizing for shirts should be approached with planning and precision. Here are some actionable tips to ensure your designs look great across all garment sizes.
Consider print area restrictions. Be mindful of limitations related to shirt edges, seams, pockets, or buttons to ensure proper adhesion and a clean look.
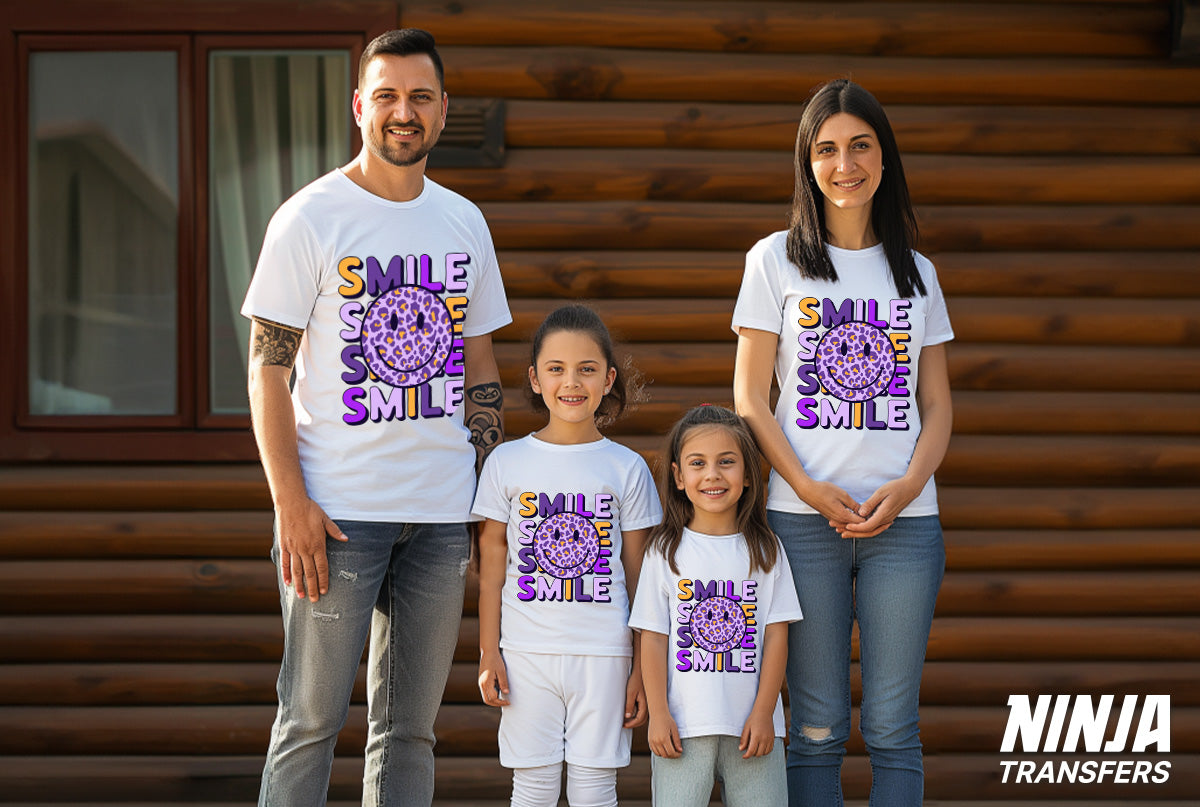
Plan your size variations. Determine the number of design sizes you'll need based on your range of garment sizes to ensure proportionate designs across various sizes. Learn about proper print locations and standard sizing with our DTF transfer placement guide.
Aim for balanced designs. Moderation in graphic size is important, especially for logos and text, to maintain aesthetic appeal and avoid a "walking billboard" look.
Maintain consistency with ratios. Start by sizing the largest design first, then use the same ratio of print-to-surface area to scale down for smaller sizes to keep the visual impact consistent.
Preview designs with test prints. Print your designs at intended sizes on regular paper, cut them out, and place them on shirts to visualize the final look before printing.
Use alignment tools. Utilize T-shirt rulers or a DTF Alignment Ruler Set to accurately measure garments, plan design sizes, and position designs consistently. Rulers are highly recommended for ensuring you keep your DTF transfers straight.
Create gang sheets for efficiency. Combine multiple designs into a single print layout to reduce waste and save costs, especially when printing vector graphics. If you are working with raster files, consider using an online gang sheet builder to organize your different sizes efficiently.
Seek professional help if needed. Consider hiring a freelancer or reaching out to our design department for assistance with art files or scaling difficulties.
Perfecting Your DTF Designs for All Sizes
Determining the right transfer size for shirts and scaling them properly doesn't have to be daunting. By understanding the nuances of vector and raster graphics, using the right tools, and planning carefully, you can make your designs look fantastic on any shirt, from tiny toddler tees to large 3XL garments.
For all your custom DTF film needs, Ninja Transfers has you covered. Whether printing a single shirt or handling a large order, our high-quality films and heat press supplies will help you achieve professional results. With Ninja Blanks, you can find a wide range of garments in every size, making us your one-stop shop for all your printing projects. Start your journey to becoming a print ninja today.